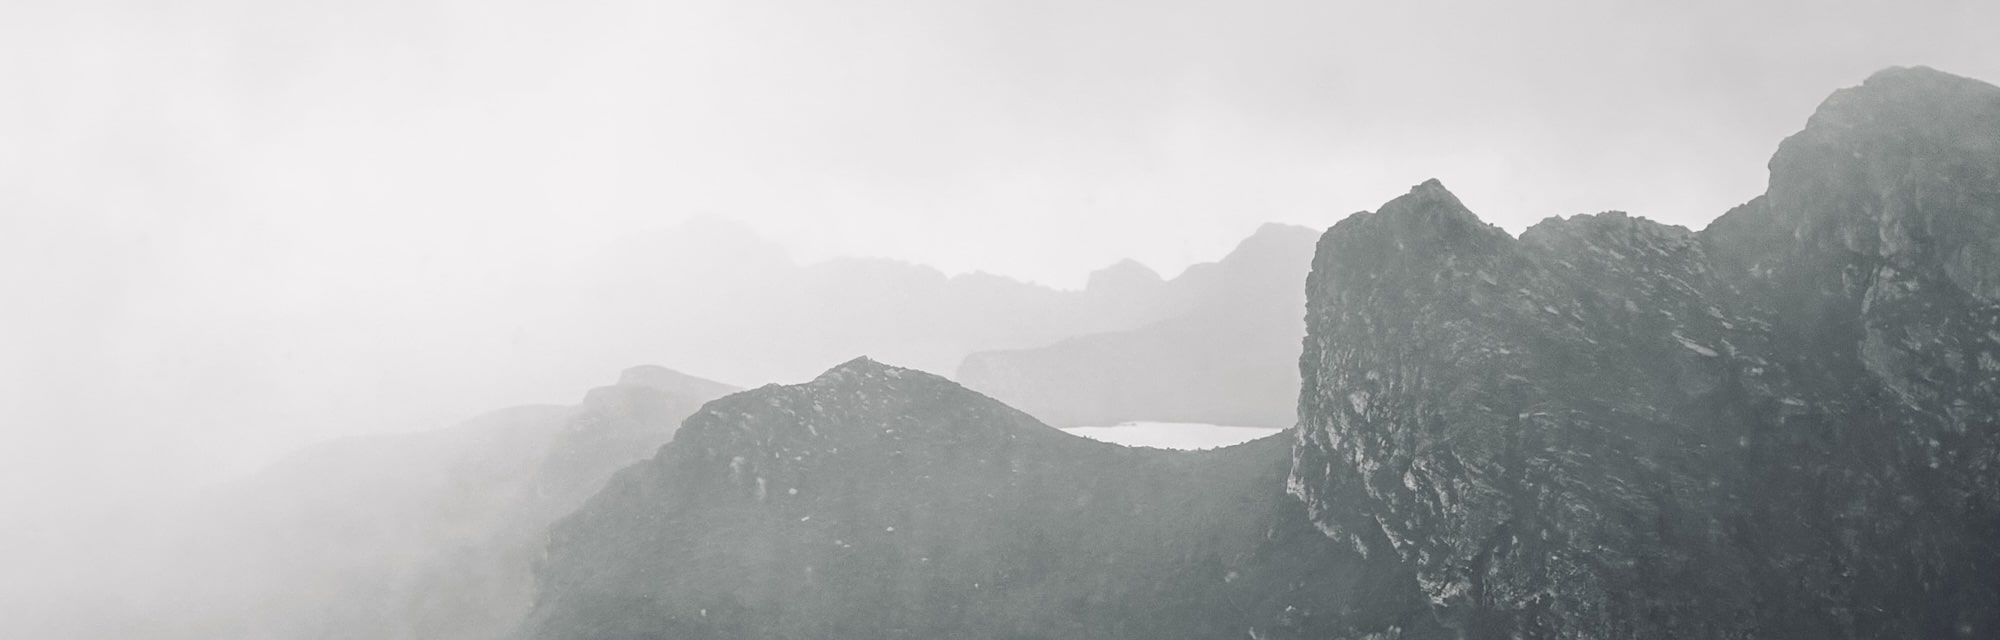
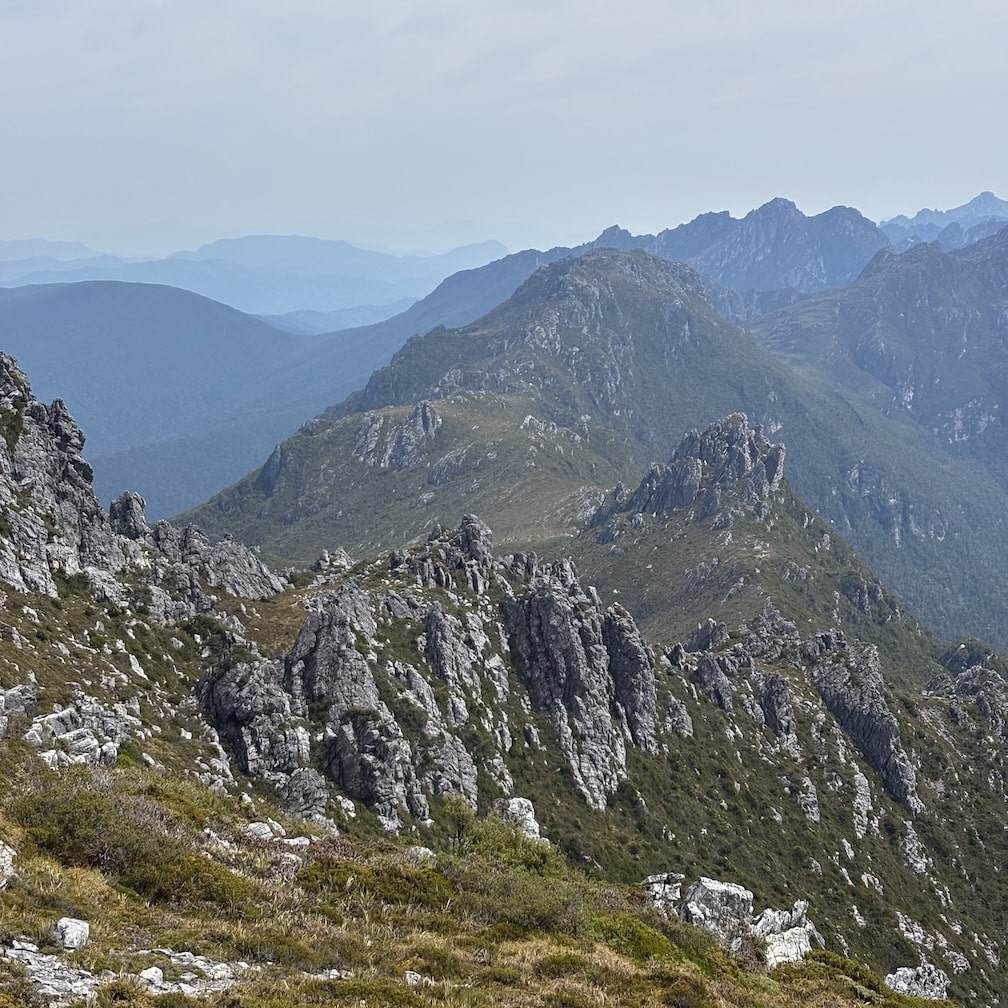
The Arthur Range in Tasmania sits at the pinnacle of Australian hiking experiences. Spectacular, unique landscapes line a trail that is both challenging and extremely fulfilling. It contains some of the hardest on-trail experiences in Australia.
So your question is: ‘I’ve done easier hikes, am I ready for South-West Tasmania?’ This guide aims to answer that question.
This is a region where many hikes don’t go according to plan. Mostly it’s for mundane reasons, but occasionally they become tragic ones*.

Hopefully by the end of this article you’ll have a better understanding of what to expect. But don’t expect a step-by-step guide to the trail itself; for that you should read and carry Chapman’s notes. This is instead some of the information you need to make the difference between a good and a bad experience.
Planning The Route
The Arthur Range is neatly divided into the Eastern and the Western Arthurs. Between them are two possible exits: Pass Creek at the gap in the ranges, and the descent on Kappa Moraine in the Westerns. Therefore, you have four options:
- Walk the Western Arthurs from Alpha to Kappa Moraine, starting at Scott Peak and returning via McKay’s track.
- Walk the Full Western Arthur Traverse. Same approach and return but exiting further east at Lucifer Ridge or Pass Creek.
- Walk the Eastern Arthurs alone. Either out and back from Farmhouse Creek or as a long circuit back via the Huon track. If you plan to include a side ascent of Federation Peak, aim to do it with someone who has done it before as the climb is important to do correctly.
- Walk the Full Arthur Traverse (Eastern and Western). Generally from Scott Peak to Farmhouse Creek or vice versa.
Whichever walk they choose, the biggest mistake people make in planning is to not allow enough time. This is for three reasons:
- You need to allow extra days to be able to sit out the notorious storms rather than trying to move in them. At a minimum, you should allow one extra rest day per 5 walking days. Even this may not be enough if you get unlucky with the weather. Southwest Tasmania laughs at the plans of humans.
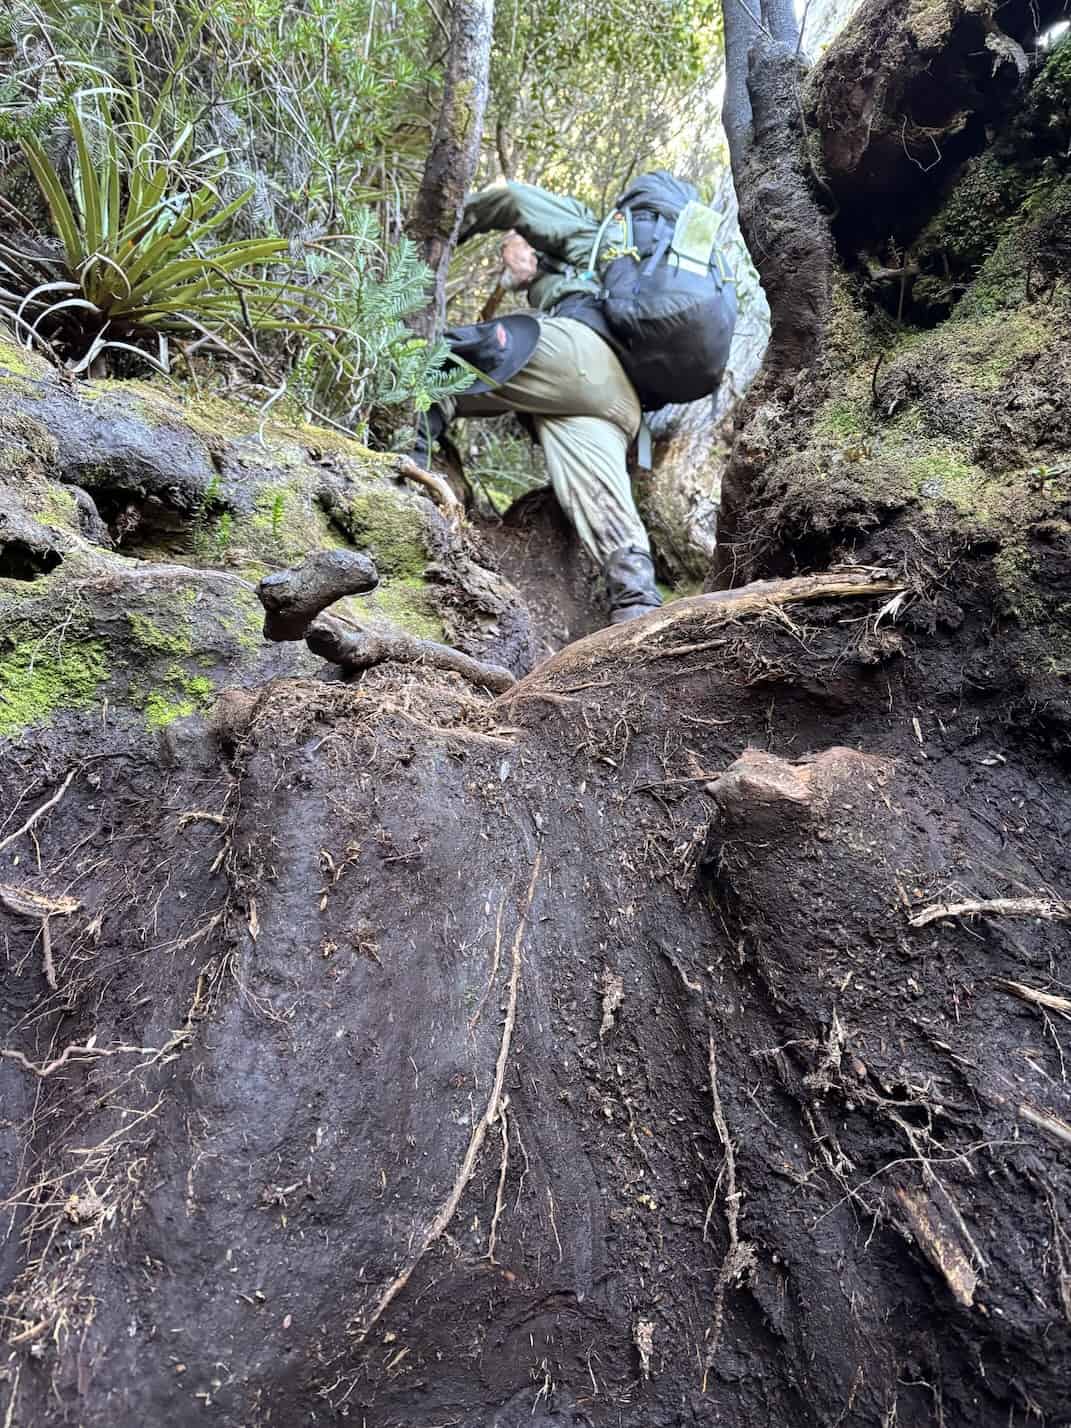
- You will cover far fewer kilometres per day than in almost any other terrain in Australia. It’s better to think of these days in terms of hours walked rather than distance travelled. Moss Ridge takes most of a day. It’s 3km.
- It is common to be inadequately prepared for the significant ups and downs of the trail. Train by doing repeated efforts carrying the full pack weight (20+ kg for the full traverse). Good rules of thumb are that you should be able to do the Mount Lofty summit (475m elevation) in less than an hour and be able to haul yourself up muddy ascents like these.
Here, for example, is a fit group’s planned versus actual itinerary for the Eastern and Western traverse.
| Planned | Actual | Notes |
| FC→ Crest Camp | FC→ Sydney Lake Track | Slow going with heavy packs |
| → Bechervaise Plateau | SL→ Forest campsite | “ |
| → Hanging Lake or Goon Moor | FC→ Bechervaise Plateau | Moss Ridge |
| → Pass Creek | BP→ Goon Moor | Long, technical day |
| → Promontory Lake | GM→ Lake Rosanne | Ditto, went on to LR to shorten day 6 |
| → Haven lake | LR→ Promontory Lake | Long but not very technical |
| → High Moor | PL→ Haven lake | Short, technical day |
| → Lake Oberon | ↻ Haven lake rest day | Gales, hail, subzero temperatures |
| → Lake Cygnus | HL→ High Moor | Continuous ascent and decent, frequent climbing |
| → Scott Peak | HM→ Lake Oberon | “ |
| spare | LO→ Junction Creek | Long day to get down out of bad weather |
| spare | JC→ Scott Peak | Half day |
Group vs Solo
There is definitely a time and a place for solo hiking in Australia, but it’s not Southwest Tasmania. Just look at this list of common challenges and think how much harder they are to overcome on your own:
- Identifying and treating hypothermia
- Finding the correct route up a climb
- Avoiding going off trail
- Sharing lost or broken equipment
- Pack hauling
- Providing support after snake bite, injury or illness
- Picking up lost gear
- Making good decisions
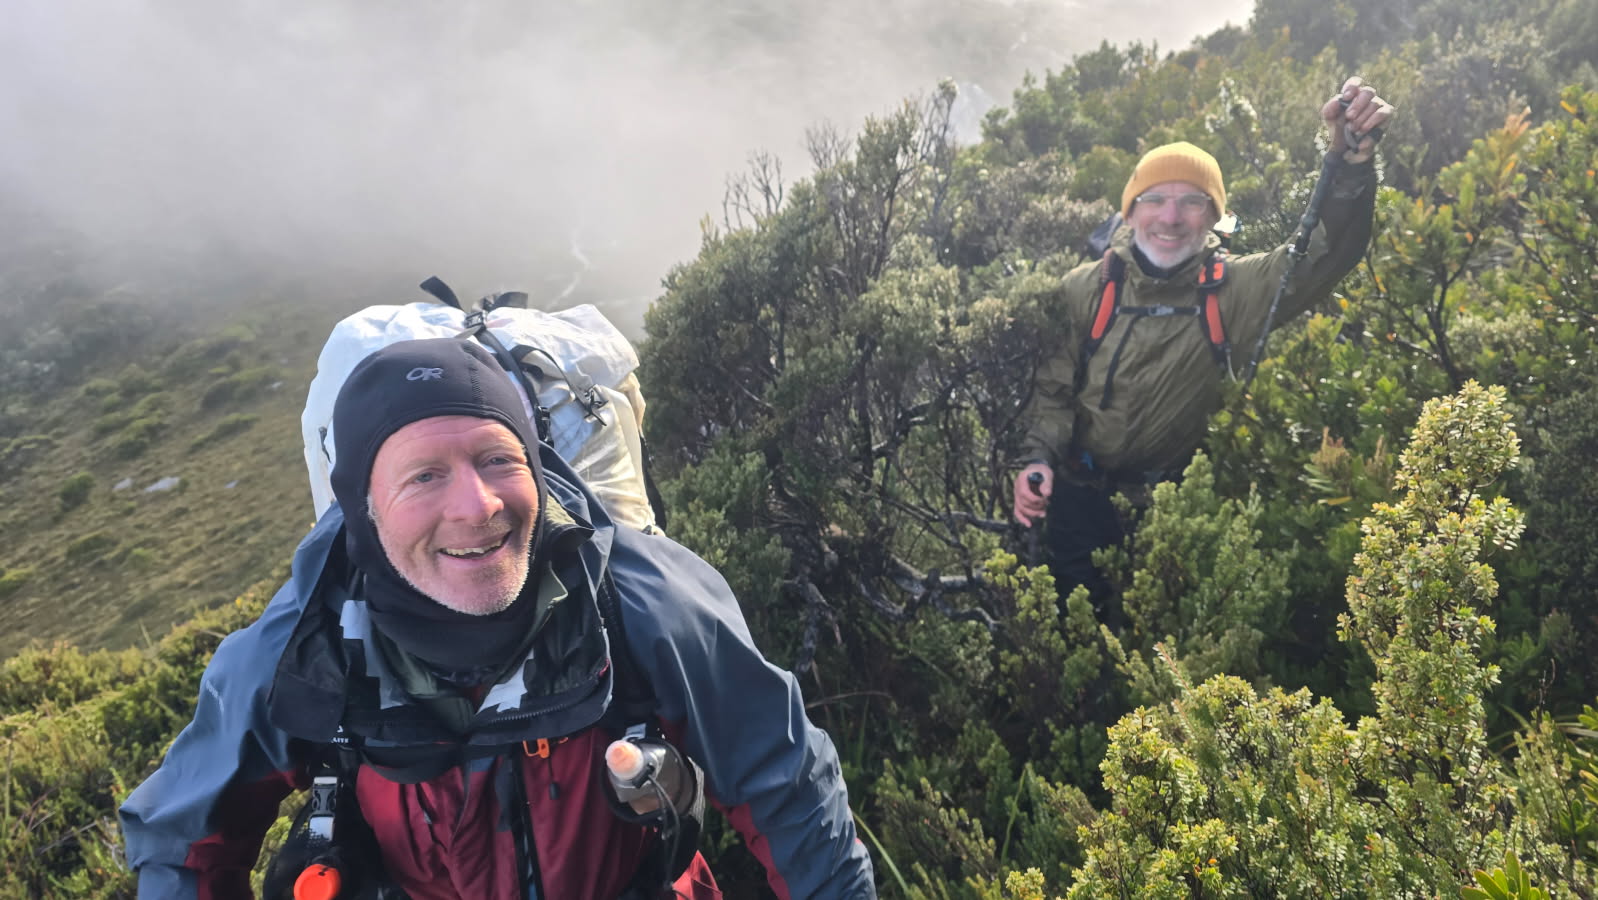
Generally, when talking remote adventures, building in redundancy for anything you can’t live without is key. That’s a lot easier to do with company. Of course the company you choose needs to be both physically and mentally prepared for the challenge ahead.
You can’t rely on rescue if the weather deteriorates significantly and crews can’t get to you safely. An ideal minimum group size is four people. If there is an emergency, one can stay with the affected person while two others organise help. Or two can go on while the victim of minor injury or equipment failure is walked out by the third.
If you have no choice but to go alone, then consider this. Every good weather day in Summer there are departures from Farmhouse Creek or Scott Peak. These people will almost invariably be happy to have an extra member, if not in the group, then at least some distance ahead. This way even if you’re solo, someone can still keep an eye out for you.

And now consider this. You might say “I know the risks and I’m happy to take them.” But have you thought about the effects on other walkers, your friends and family, and the risks to search & rescue personnel should you not make it back.
Here are some more ways to make a solo trip safer:
- Write detailed intentions in log books
- Leave clear instructions with loved ones about your planned itinerary and what to do if you don’t check in at expected times
- Carry a two-way satellite messaging device
- Check in whenever possible – there is phone reception on many of the peaks
Trail Conditions
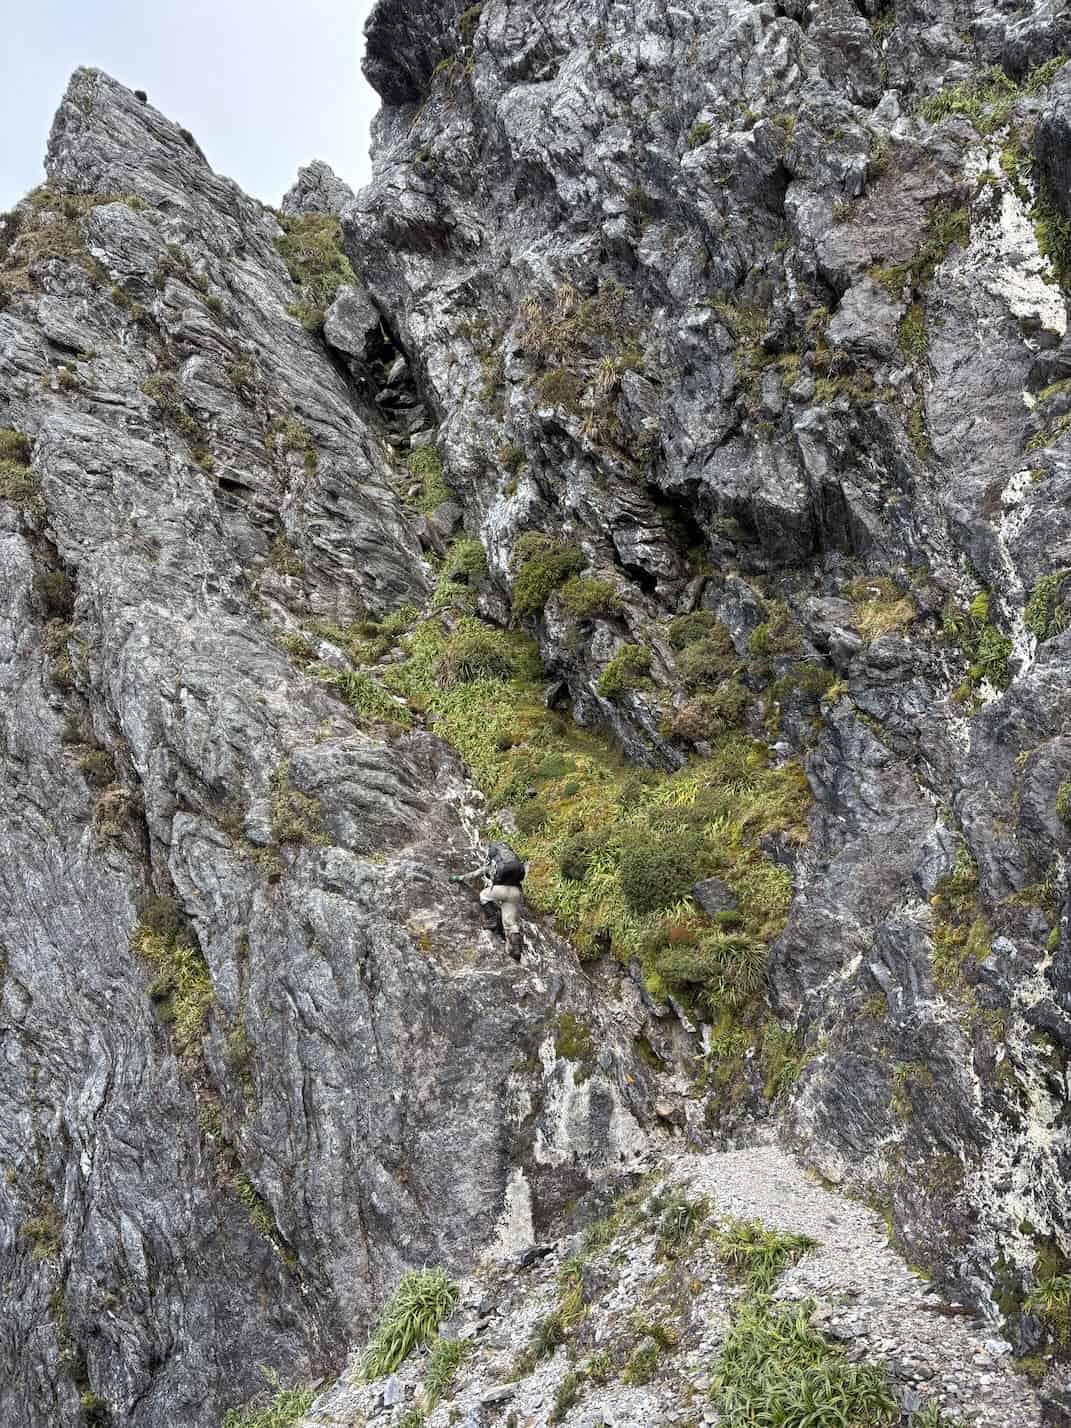
The biggest surprise may be the quantity of low-grade rockclimbing you will need to do, while wearing a pack and often in wet, windy conditions. Haste and fatigue are the enemies here; if you’ve trained adequately, take your time and don’t go beyond your limits, it’s reasonably safe. A head for heights, and some upper body strength are useful to have.
There are few trail markers, but the path is generally clear enough, especially in the Western Arthurs. Over rockier sections, there are usually small rock cairns to guide you on the correct route. You’ll save a lot of energy by looking carefully for these when the way isn’t obvious. Sometimes all that’s left is a single rock sitting in an unnatural position.

Along the whole trail there are many false tracks created by people following what looked like the most obvious route rather than the correct one. Be prepared to do a fair bit of backtracking but if you share the lead then those behind will benefit from the work of those in front. Chapman’s notes and an offline digital map are handy for keeping on the correct path when there are choices to be made. A paper map is very useful for the big picture but isn’t detailed enough for the twists and turns or when visibility drops to a few metres.
Lastly, there are river crossings in the lowlands that can become very dangerous after rain. It’s useful to have a rope for these (and possibly for pack hauling) but if you feel unsafe to cross, it’s best to wait it out. These creeks rise and fall quickly.
Gear Choices
Good features in shoes would be insulation against the cold and firm soles with hard edges to gain better purchase on footholds. It’s also smart to come with a pair in good condition, because it’s hard to keep them going if they fail halfway.

All the major high altitude campsites have tent platforms with a variety of attachment points. Therefore, it’s quite easy to secure almost any good quality tent against gale force winds. However, it’s still common to hear of people whose tents weren’t up to scratch. Make sure you take a tent that has a proven ability to handle extreme weather.
You should bring a heavy-duty waterproof jacket and waterproof pants. You’re probably going to live in these for days at a time. Waterproof gloves are highly recommended too. Don’t make the mistake of going up there with an old jacket or pants whose waterproofness you haven’t recently tested.
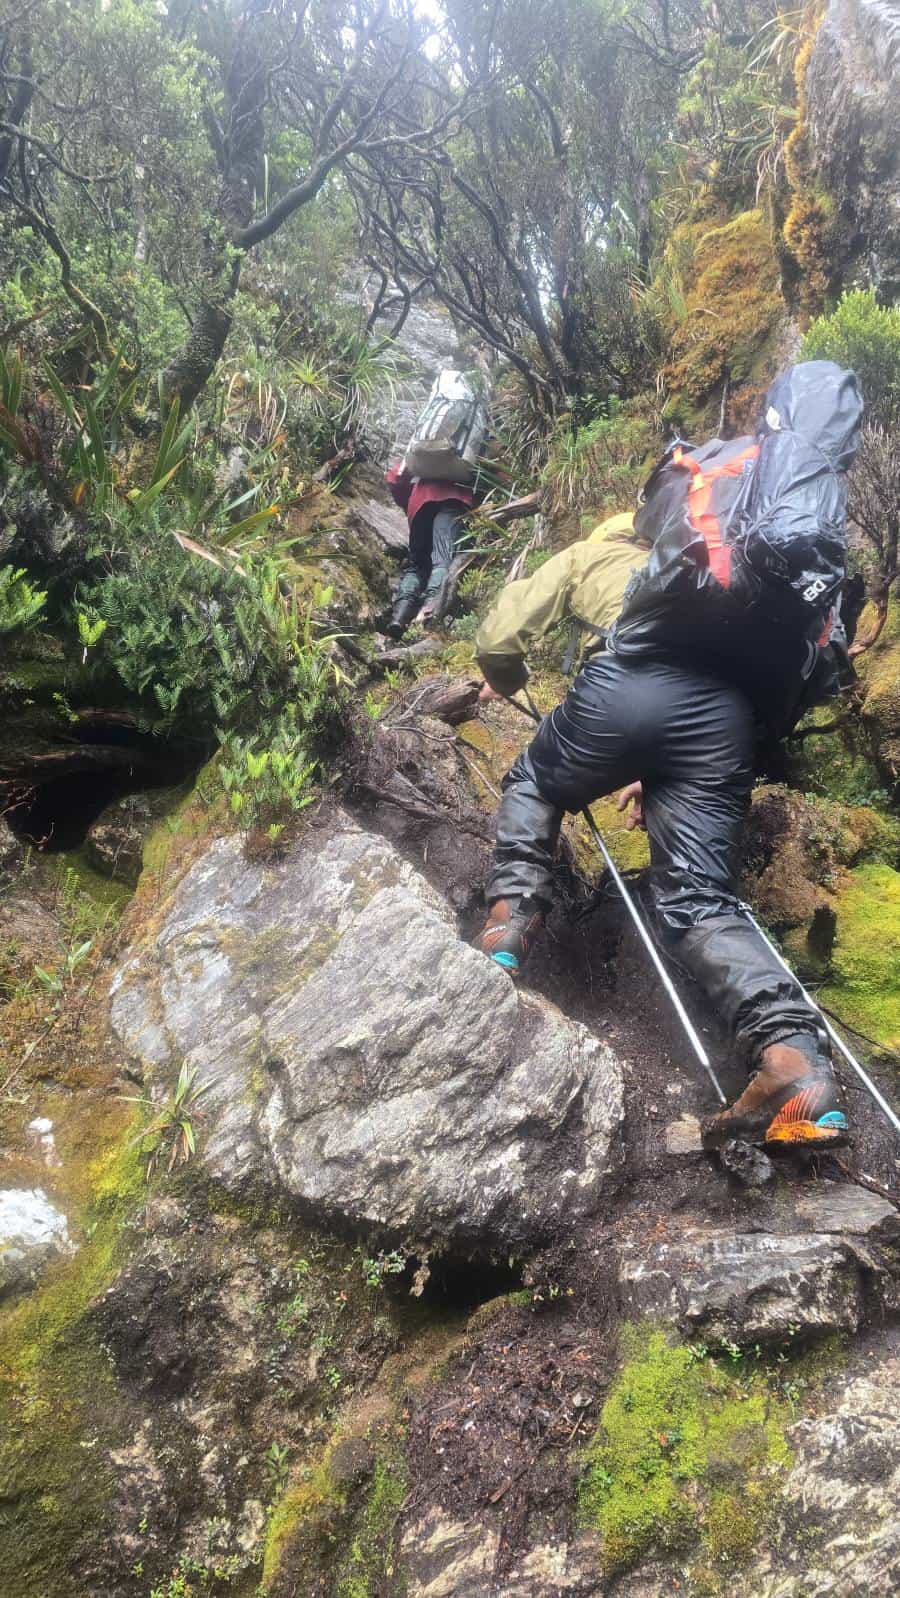
Many parts of the track are overgrown with head-high Scoparia. If you’re wearing shorts, it’s going to hurt a lot to push through. A pair of long pants plus long sleeves and gloves will save a lot of pain.
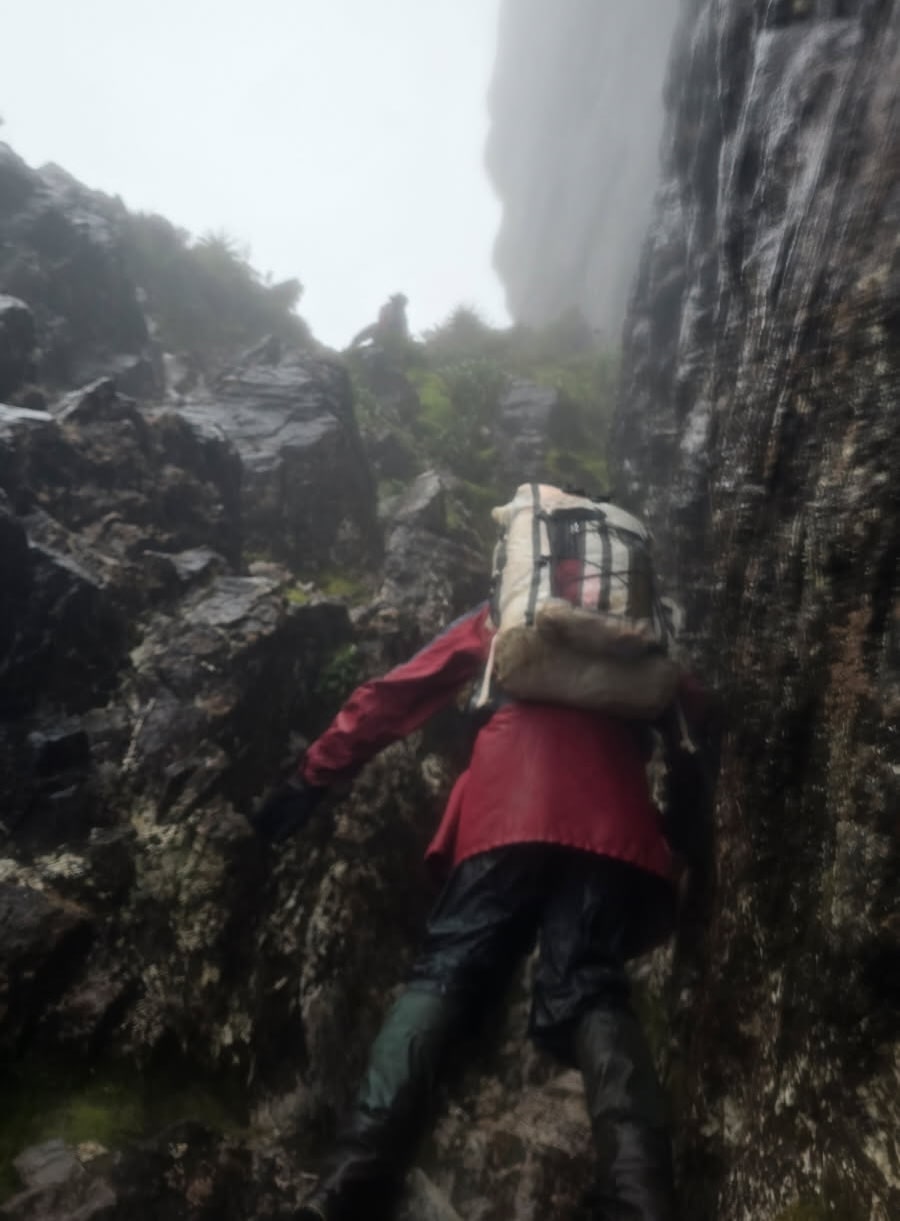
For the same reason, equipment attached to the outside of a pack is very likely to be pulled off by the vegetation and lost. Loose straps and loops will snag and can literally leave you hanging. Outside pockets on packs may be torn out. The ideal pack will have a smooth exterior, and not be wider than your body or taller than your head. It will also fit well so it doesn’t shift and unbalance you whilst climbing.
Be prepared to start every day in the same wet clothes. As long as they’re not cotton, and you’ve layered up well, you should be comfortable enough. But don’t be tempted to make the worst beginner’s mistake of all: wearing your last dry set. You must keep a full change of warm, dry clothes in a waterproof bag to change into when you stop. They may save your life.
Lastly, in all this talk of cold, don’t forget that it’s also often sunny and exposed up there. In dry spells you’ll need to carry at least 3 litres of water between campsites. Bring sunscreen and lip protection, and cool walking clothes too.
If all this real world talk has made you rethink your goals, that’s great. In fact it’s a sign of true bushcraft to adapt your plans to suit the environment. No one is saying don’t go to the Arthurs, just go there fully prepared. That way, you can have the extreme adventure without the risk.
We all want the same thing: to make this the trip of a lifetime.
🙂Thanks to the walk leaders who helped get this article shipshape, and to Peter, Dani and James for providing such outstanding company! Due to electronics failure, the wet Western Arthurs photos and this cracker are supplied by Dani.
*To get an idea of the numbers, visit this Tassie news outlet and search ‘bushwalker’.
This article is published by Adelaide Bushwalkers, a club with a strong safety culture. Further thoughts from any members would be gratefully received in the comments section below.
Thanks Andrew. A great article about key issues to consider for any remote hike and especially for this location.